Dna Origami Template
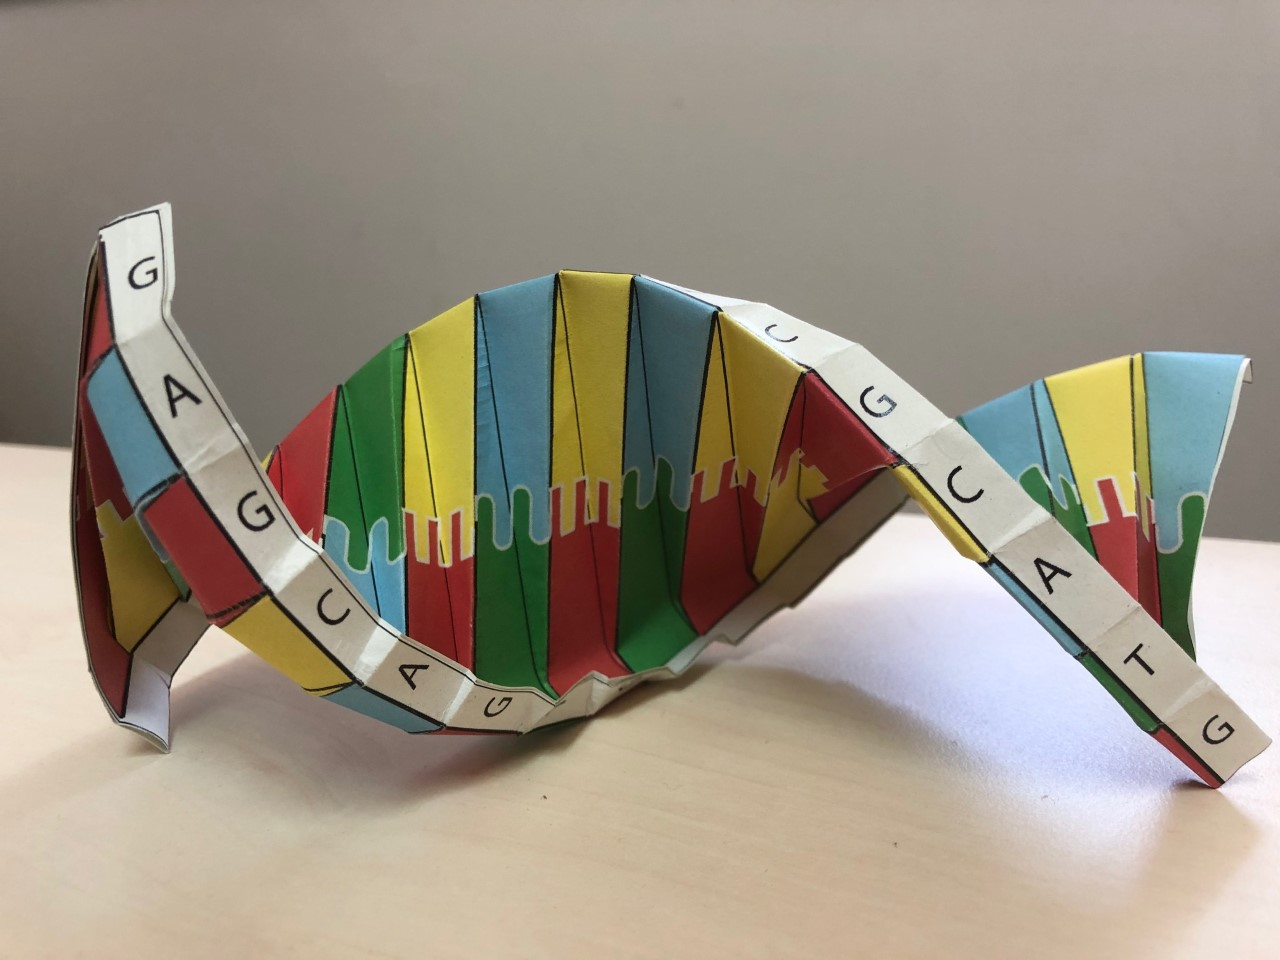
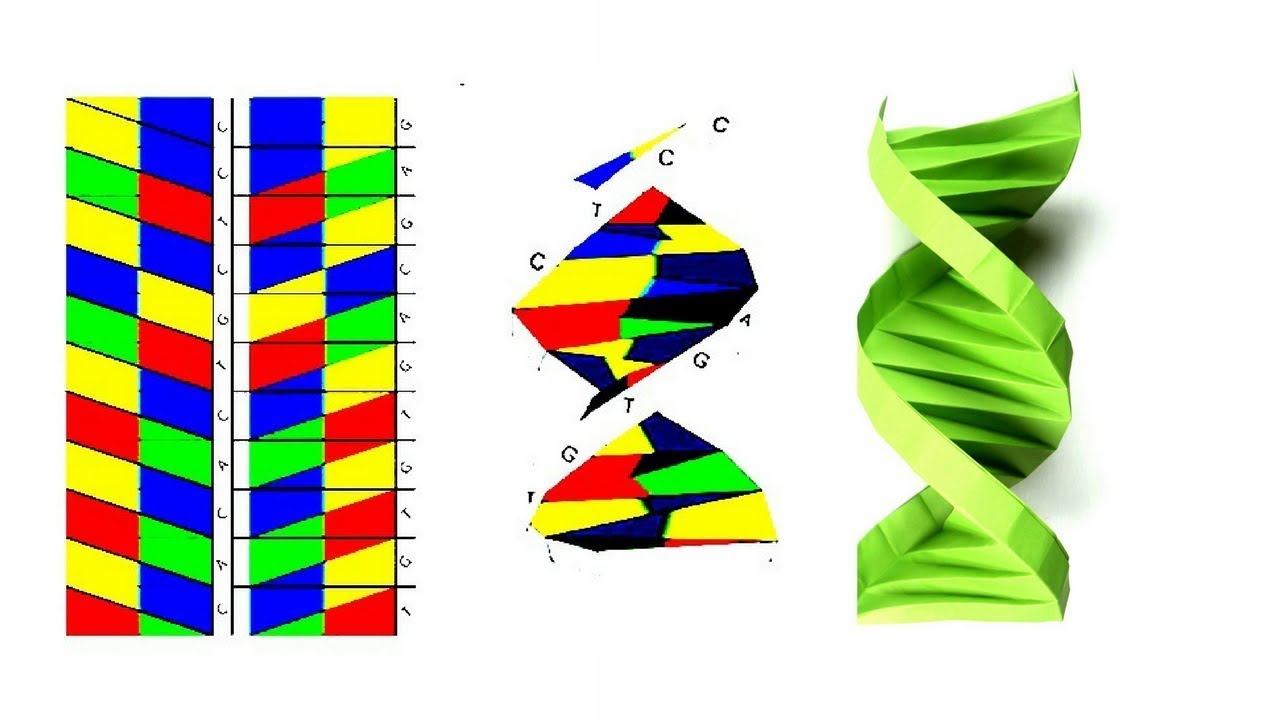
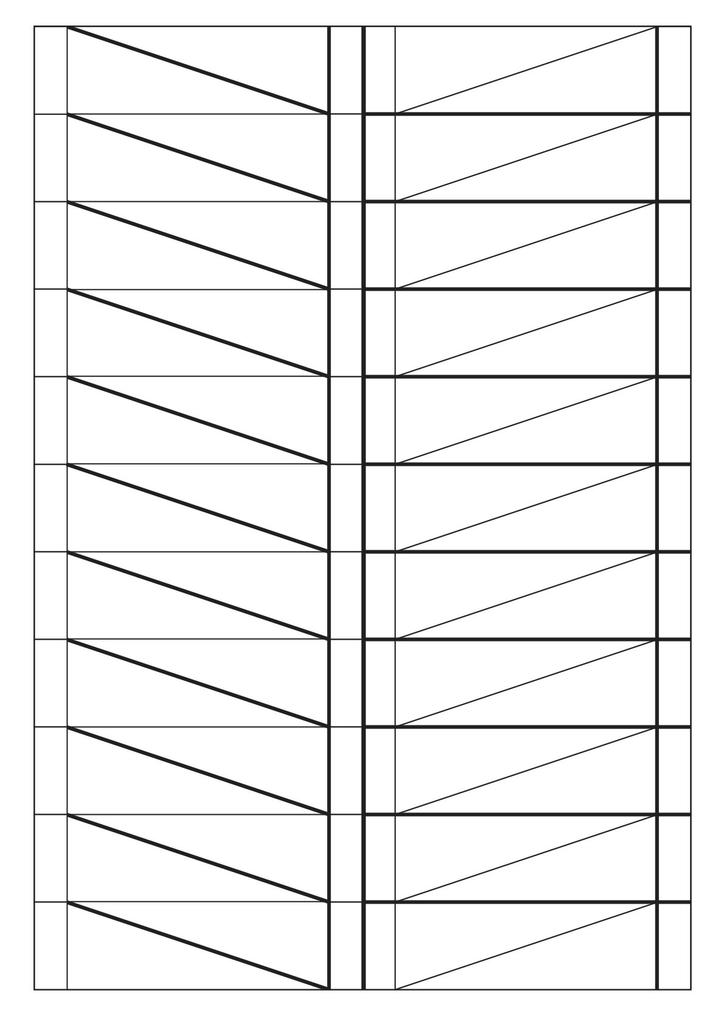
Dna Origami Template - Designed by alex bateman (2003) 2. Cut the white border off the top, bottom, and sides of the template. Cut the white border off the top, bottom, and sides of the template. Below you will see the nitrogen bases in dna that represent the “purines” and the “pyrimidines”. Only another 2,999,999,989 (or so) more to complete your whole genome! Designed by alex bateman (2003) 2. The next page contains a black and white version of the template; And fill in the top box of that column with any letter. Making your dna model folds for your dna model 1 1. Lay out the blank dna origami template on the table. Fold all solid lines going lengthwise down the page into mountain folds. Designed by alex bateman (2003) 2. You can also use the blank version to explore the pairing rules of dna, by colouring in each base pair using the pairing rules printout. 5 continue the complementary sequence until you reach the bottom; Continue your sequence down the column on the right. Trends in biochemical sciences, 20: Adapted from yen, t., 1995, make your own dna. Fold fold old old diagonal lines should be in this direction flip the paper and fold remaining edge. Starting at the top, start to fold, twist, and compress the dna until it folds onto itself. 3 continue your sequence down the column on the right. Cut the white border off the top, bottom, and sides of the template. Continue your sequence down the column on the right. Designed by alex bateman (2003) 2. Continue your sequence down the column on the right. Instructions for making of dna paper model components: Lay out the blank dna origami template on the table. Starting at the top, start to fold, twist, and compress the dna until it folds onto itself. Cut the white border off the top, bottom, and sides of the template. Start by writing the fi rst letter of your dna sequence (a,t, g or c) in the top right corner.. Print out a copy of the origami dna helix template on regular printer paper. Starting at the top, start to fold, twist, and compress the dna until it folds onto itself. Write the corresponding bases in boxes Flip paper over and fold each diagonal line toward you with crisp sharp folds and unfold. Origami dna pairing rules dna is made. Print out a copy of the origami dna helix template on regular printer paper. Only another 2,999,999,989 (or so) more to complete your whole genome! Start by writing the fi rst letter of your dna sequence (a,t, g or c) in the top right corner. Cut the white border off the top, bottom, and sides of the template. Admire your. Using the blank dna origami template 1. You can also use the blank version to explore the pairing rules of dna, by colouring in each base pair using the pairing rules printout. Fold all solid lines going lengthwise down the page into mountain folds. Designed by alex bateman (2003) 2. 3 continue your sequence down the column on the right. Origami dna pairing rules dna is made up of four units or ‘bases’, known as a, c, g and t. 2 start by writing the first letter of your dna sequence (a, c, g or t) in the top right corner. Using the blank dna origami template 1. Instructions for making of dna paper model components: Admire your completed dna. Each of the bases binds with one partner: Write the corresponding bases in boxes Designed by alex bateman (2003) 2. Using the blank dna origami template 1. Designed by alex bateman (2003) 2. Using the blank dna origami template 1. Using the blank dna origami template 1. Write the corresponding bases in boxes Write the corresponding bases in boxes 2 start by writing the first letter of your dna sequence (a, c, g or t) in the top right corner. Admire your completed dna double helix! Each of the bases binds with one partner: Making your dna model folds for your dna model 1 1. Write the corresponding bases in boxes Pairs with pairs with a t c g Using the blank dna origami template 1. Start by writing the first letter of your dna sequence (a,t, g or c) in the top right corner. Fold fold old old diagonal lines should be in this direction flip the paper and fold remaining edge. 3 continue your sequence down the column on the right. Trends in biochemical sciences, 20: Each of the bases binds with one partner: You need to color the a,t,c,& g’s the proper color that they should fluoresce at. 3 continue your sequence down the column on the right. Making your dna model folds for your dna model 1 1. Print out a copy of the origami dna helix template on regular printer paper. Designed by alex bateman (2003) 2. Trends in biochemical sciences, 20: Designed by alex bateman (2003) 2. Lay out the blank dna origami template on the table. Using the blank dna origami template 1. Cut the white border off the top, bottom, and sides of the template. Designed by alex bateman (2003) 2. To start folding your dna, print the ˜rst page on 11x17 or tabloid paper. Design principles of 2d dna origami according to rothemund’s approach. And fill in the top box of that column with any letter. Admire your completed dna double helix!.pdf.jpg)
STEM
Origami Dna Template

DNA Origami DIY Tutorial by Paper Folds 842 YouTube

Origami Dna Model Origami Dna Model origami dna model paper dna double
Origami DNA; How to Fold a Paper Origami DNA YouTube

Dna Origami Template

How To Make Dna Model With Paper

DNA origami structure. (A) The method employed to prepare a DNA origami
Printable Paper Dna Model Template Printable Templates

DNA Origami How to fold a double Helix YouTube
Start By Writing The Fi Rst Letter Of Your Dna Sequence (A,T, G Or C) In The Top Right Corner.
Instructions For Making Of Dna Paper Model Components:
Lay Out The Blank Dna Origami Template On The Table.
Fold All Solid Lines Going Lengthwise Down The Page Into Mountain Folds.
Related Post: